Showing posts with label Mailbox. Show all posts

Friday, October 1, 2021

Unlimited Exchange Online Archiving is no longer Unlimited

TLDR: Microsoft has added size restrictions to Unlimited Archiving (aka Auto-Expanding Archiving). The change will take effect beginning November 1, 2021. Once this limit takes effect, users will not be able to extend their online archives beyond 1.5TB.


Upcoming Changes to Auto-Expanding Archive

MC288051 · Published 29 Sept 2021 · Last updated 30 Sept 2021


Message Summary

Updated September 30, 2021: We have updated the content below for additional clarity. Thank you for your patience.

We will be removing the word ‘Unlimited’ from our service description and related public documentation for the auto-expanding archiving feature, and instituting a 1.5TB limit for archive mailboxes. This limit is not configurable.


Key points

  • Timing: This change will take effect beginning November 1, 2021 and is applicable to all environments.
  • Roll-out: tenant level
  • Action: review and assess


How this will affect your organization

Once this limit takes effect, your users will not be able to extend their online archives beyond 1.5TB. As currently noted in our documentation, auto-expanding archive is only supported for mailboxes used for individual users or shared mailboxes with a growth rate that does not exceed 1 GB per day. Using journaling, transport rules, or auto-forwarding rules to copy messages to Exchange Online Archiving for the purposes of archiving is not permitted. A user's archive mailbox is intended for just that user. Microsoft reserves the right to deny auto-expanding archiving in instances where a user's archive mailbox is used to store archive data for other users or in other cases of inappropriate use.

If you have previously worked with Microsoft Support to provide exceptions for existing archives exceeding 1.5TB, those specific archives will not be affected by this change. You will not, however, be able to create any new archives that exceed 1.5TB.


What you need to do to prepare

You should check the size of archives in your organization if you are concerned that they might be close to the limit and consider deleting some of the content if you intend to continue adding to the archive. You can use Get-MailboxFolderStatistics to view archive mailbox size.

Wednesday, June 24, 2020

RecipientNotFoundPermanentException when migrating a mailbox to Exchange Online

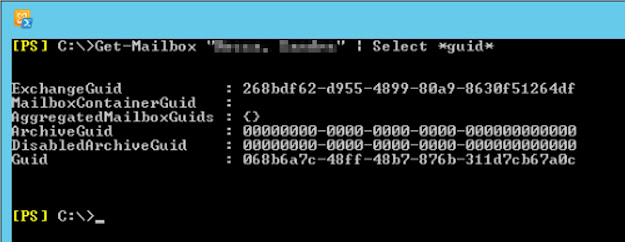
The other when migrating a mailbox from an on-prem Exchange 2013 environment to Exchange Online, I was faced with a RecipientNotFoundPermanentException error with the message “Error: Cannot find a recipient that has mailbox GUID '39c970e4-4869-47ee-b9af-f6fd6264ee0a'.


These were the details for the mail user in Exchange Online (notice the ExchangeGuid attribute):


 And these were the details for the mailbox on-premises:


As you can see, the ExchangeGUID was the same! And where was that '39c970e4-4869-47ee-b9af-f6fd6264ee0a' GUID coming from?!

After much troubleshooting, I ended up logging a support ticket with Microsoft. According to the engineer, “this issue is caused due to multiple mailbox shards”. Unfortunately, he wouldn’t go into details as apparently it is all secret stuff... But he ran some diagnostics to resolve the issue, and after a few minutes all was well with the world again!

Friday, April 29, 2016

Empty StorageLimitStatus when running Get-MailboxStatistics in Exchange 2013/2016

The old version of this script, used to gather some statistics out of mailboxes, made use of the StorageLimitStatus attribute of mailboxes (when running the Get-MailboxStatistics cmdlet). However, if you run the script in an Exchange 2013/2016 environment, you will notice that this attribute is always blank while with Exchange 2010 it is not... Unfortunately, this is by design...
 
Unlike versions of the Information Store earlier than the one that comes with Exchange 2013, the Information Store in Exchange 2013 does not cache the values of mailbox quotas. Therefore, the Information Store makes frequent calls to Active Directory (AD) to retrieve the values of mailbox quotas for each mailbox that is specified in the Get-MailboxStatistics cmdlet. Because of the frequent calls to AD, admins may experience poor performance in Exchange. To avoid this, the default Get-MailboxStatistics cmdlet does not retrieve the mailbox quotas and does not display a value in the StorageLimitStatus field...
 
To work around this issue, all we can do is either use the Exchange Admin Console (EAC):
  1. Log on to EAC by using a user account that is assigned at least the Mail Recipients role;
  2. In the feature pane, click recipients. A list of mailboxes is displayed;
  3. Select the mailbox of which you want to verify the quota status and then click the Edit button on the toolbar;
  4. Click mailbox usage. The mailbox quota usage is displayed.
Or we can use the Exchange Management Shell and run the following cmdlet:
Get-Mailbox "user" | FT *quota*, *size -AutoSize

The script has now been updated for Exchange 2013/2016 environments to work around this "issue".

Monday, December 10, 2012

Mailbox Size Increases when Transitioning to Exchange 2013

If you are transitioning from Exchange 2007/2010 to Exchange 2013, we will see that the reported size of the mailboxes will increase around 30 to 40%! Don’t be alarmed just yet. The actual space used by the mailbox database will not increase by 30% as this only refers to the attribution of space used by each individual mailbox.

Basically, Exchange 2013 now includes in the mailbox size attribute all the properties of items in a mailbox, thus providing a more accurate calculation of space taken by items in a mailbox and, therefore, the whole mailbox itself.

The problem with this is that, during a migration, users might exceed their mailbox quota when their mailbox is moved to Exchange 2013 and be prevented from sending and/or receiving e-mails...

So, in order to prevent this from happening, I suggest increasing everyone’s mailbox quota by 40% prior to their move. You can either do this at the mailbox database level if your users are using the database quotas, or individually on a per-user basis.

For example, if you want to increase by 40% the ProhibitSendQuota value for all users that are not using the database quota defaults, you can use the following cmdlet:
Get-Mailbox -ResultSize Unlimited -Filter {UseDatabaseQuotaDefaults -eq $False} | Where {$_.ProhibitSendQuota -ne "unlimited"} | ForEach {Set-Mailbox $_ -ProhibitSendQuota "$($($_.ProhibitSendQuota).Value.ToMB() * 1.4)MB" -WhatIf}

However, don’t forget to set the IssueWarningQuota or ProhibitSendReceiveQuota if you are using them! Note that this is not the best method as users might end up with a quota of 1523MB for example when the ideal value would be 1500MB...

Tuesday, September 11, 2012

Mailboxes Quarantined due to Troubleshoot-DatabaseSpace.ps1 Script

Exchange 2010 SP1 added a new script called Troubleshoot-DatabaseSpace.ps1 that is used to detect excessive growth of database and log drive volumes. This script can be run manually by administrators but if you have Microsoft System Center Operations Manager (SCOM) 2007 it is run automatically every 15 minutes.

This script performs the following actions:
1. Track log generation rate for the highest log generators (mailboxes) per database. This helps determine which users are logging too heavily and potentially causing space issues;
2. Track available disk space for both database and log files. If either of these is within a configurable threshold of being full (25% by default), further action must is taken;
3. Track log generation rate. If it appears that the disk is going to run out of space within the value specified by the HourThreshold parameter (12 hours by default and based on the log generation rate), further action is taken;
4. If all of the above conditions are fulfilled, the script determines the list of top 25 users who accessed the database during the last 1 hour period. The script then quarantines the top high-usage mailboxes for 6 hours, during which they will not have access to e-mail;
5. If the troubleshooter is unsuccessful at dropping the log generation rate to below the threshold level, it will write out events that translate into health model alerts. At this point, the script removes the database from provisioning by running the Set-MailboxDatabase cmdlet with the ExcludeFromProvisioning parameter set to $True against the specified database;


When mailboxes are quarantined, you will see entries in the Registry of the mailbox server hosting that database/mailbox in:
HKEY_LOCAL_MACHINE\SYSTEM\CurrentControlSet\Services\MSExchangeIS\"server_name"\Private-"DB.Guid"\"Mailbox_Guid"


To check the events logged by this script go to the mailbox server you want to check and then Event Viewer -> Application and Services Logs -> Microsoft-Exchange-Troubleshooters/Operational. Note that if you run the script manually through the Shell it will not produce any output - you have to check the Event Viewer.


If you run the script manually without any parameters or if you have SCOM running this script automatically, then it will use default values specified in the StoreTSConstants.ps1 script located in the same folder. This is where you can customize the 25% threshold, for example, if it is not ideal for your environment:

   # The percentage of disk space for the EDB file at which we should start quarantining users.
   $PercentEdbFreeSpaceDefaultThreshold = 25

   # The percentage of disk space for the logs at which we should start quarantining users.
   $PercentLogFreeSpaceDefaultThreshold = 25

   # The percentage of disk space for the EDB file at which we are at alert levels.
   $PercentEdbFreeSpaceAlertThreshold = 16

   # The percentage of disk space for the EDB file at which we are at critical levels.
   $PercentEdbFreeSpaceCriticalThreshold = 8

   #The number of hours we can wait before running out of space.
   $HourDefaultThreshold = 12


In order for mailboxes to be quarantined, the –Quarantine parameter must be passed to the script, which the SCOM monitor uses by default. Because the Exchange Management Pack is sealed, you can’t change this...

So, if 25% is too high for your environment, you can change the value by updating the StoreTSConstants.ps1 script across all your mailbox servers or, ultimately, simply disable the SCOM monitors that run this script:
• KHI: Failed to execute Troubleshoot-DatabaseSpace.ps1
• KHI:The database copy is low on database volume space and continues to grow. The volume has reached critical levels 8% free.
• KHI:The database copy is low on database volume space and continues to grow. The volume has reached error levels under 16% free.
• KHI:The database copy is low on database volume space and continues to grow. The volume is under 25% free.

Tuesday, August 21, 2012

Users do not receive quota warning messages

We all know that, for better or for worse, the way Exchange calculates and sends Quota Messages changed with Exchange 2010 SP1. We also know that this has caused nothing but confusion for many Administrators out there...

In this post I will try to give an overview of the new behaviour for normal mailboxes and, more important, explain when users will actually receive these messages.

Pre Exchange 2010 SP1
In Exchange environments previous to Exchange 2010 SP1, Exchange sends a quota message to mailbox owners when a:
1. Mailbox exceeds its IssueWarningQuota limit (the lowest storage quota);
2. Mailbox exceeds its ProhibitSendQuota limit (the middle storage quota);
3. Mailbox exceeds its ProhibitSendReceiveQuota limit (the highest storage quota).

Remember that:
quota messages are sent to mailbox owners, so if a mailbox is owned by a security group (shared mailbox), quota messages are sent to the security group;
quota messages are sent with high importance and are not subject to storage quotas, which means they are always delivered even if the recipient's mailbox is full;
quotas can be configured at a mailbox or database level.

These quota messages are sent during the QuotaNotificationSchedule specified for each mailbox database, which would normally be something like every day from 4AM to 6AM:
Get-MailboxDatabase | Set-MailboxDatabase -QuotaNotificationSchedule “Mon.04:00-Mon.06:00, Tue.04:00-Tue.06:00, Wed.04:00-Wed.06:00, Thu.04:00-Thu.06:00, Fri.04:00-Fri.06:00, Sat.04:00-Sat.06:00, Sun.04:00-Sun.06:00”

During this period, Exchange goes through every mailbox in the database(s) and if any has exceeded the quota threshold, it sends the owner an e-mail. No matter if the schedule was 1h, 2h or 10h, as long as Exchange has enough time to go through every mailbox, everyone over quota receives one warning message.


Exchange 2010 SP1 Onwards
Now comes SP1 and all hell breaks loose... We still have:
the same 3 levels of quotas;
quotas configurable at the user or database level;
quota messages sent during the QuotaNotificationSchedule.

BUT.... The way these messages are generated has changed... Now, every mailbox has a flag that controls whether it is checked to see if it has exceed a quota threshold. This flag is only set if the mailbox size is more than 50% of the ProhibitSendQuota limit! Unfortunately, this flag is a system property (part of the code) and therefore not visible using MFCMapi...

Let’s take an example and imagine a mailbox currently 450MB in size. This mailbox (or its database) has IssueWarningQuota set to 400MB and ProhibitSendQuota set to 1GB. We can see the mailbox is over its warning limit but because 450MB is not over 50% of the ProhibitSendQuota (500MB), it will not be checked and will not receive a quota warning message!


On top of this, once a mailbox has been checked during the QuotaNotificationSchedule, the flag is cleared and the mailbox will not be checked again until the flag is reset. Now, here’s the problem I found: according to Microsoft documentation, this flag is reset when “either a message is saved in the mailbox or a message is submitted”. When this happens, if the mailbox size is more than 50% of the ProhibitSendQuota, the flag is reset and the mailbox will be checked during the next QuotaNotificationSchedule.

But what exactly is a saved message?! I assumed that if a user drafted a message and saved it without sending it, the flag would be reset. However, from my tests this is not the case... So far, only sending e-mails from a mailbox seems to reset this flag. This means that if you have a mailbox that only receives e-mails, it will never receive the warning message. Again, this is what I am seeing in the environment I work at and from my tests!


You might be asking why I previously emphasised the “1” in “everyone over quota receives one warning message”. By default, with SP1 the QuotaNotificationSchedule is set to run for 15 minutes every day at 1AM. If you increase this to 2h, for example, your users might receive more than one message at a time! I had cases where I had this set to run over 3h for testing purposes, and some users received 3 quota messages...


Troubleshooting
If you would like to see if/which mailboxes are over quota or received a quota message, you have a few methods:

Increase the diagnostic logging on the mailbox server you want to check:
1. Open the Exchange Management Console;
2. Choose Server Configuration;
3. Select the the server name under Server Configuration for which you want to increase logging ;
4. Choose Manage Diagnostic Logging Properties... under the Actions pane;
5. Expand MSExchangeIS;
6. Expand 900 Private;
7. Choose Storage Limits;
8. Select the Expert radio button and click Configure;
9. You don’t need to restart the MSExchangeIS service or dismount and remount the database stores;
10. The next time the QuotaNotificationSchedule runs, look for the EventID 1077 in the Application log.


Use PowerShell to check mailbox statistics:
Get-MailboxStatistics -Database MDB01 | ? {$_.StorageLimitStatus -eq "IssueWarning" -OR $_.StorageLimitStatus -eq "ProhibitSend" -OR $_.StorageLimitStatus -eq "ProhibitSendReceive"} | Select DisplayName, Alias, StorageLimitStatus

Use PowerShell to see which users received a quota message:
Get-TransportServer | Get-MessageTrackingLog -ResultSize Unlimited -Start "08/08/2012" -MessageSubject "your mailbox is" –EventID DELIVER | Select TimeStamp, Recipients, MessageSubject


Exchange 2013
I have been doing some tests with Exchange 2013 to check if the behaviour is the same, but for some reason Exchange doesn’t seem to check my mailbox for quotas...
From the screenshot below, you will see that:
1. Database DB1 has ProhibitSendQuota set to 400MB and IssueWarningQuota to 200MB;
2. My mailbox is using the database’s quota defaults;
3. My mailbox is over the IssueWarningQuota limit with a size of 246MB
4. Exchange has not set the StorageLimitsStatus for my mailbox which should say IssueWarning (if it’s the same as 2007 and 2010).

It was only when I set quota limits at the mailbox level that I started to get warning messages, so I am still trying to understand exactly what is going on with Exchange 2013...


Conclusion
To reiterate, from Exchange 2010 SP1 onwards:
Every mailbox has a flag to control if the mailbox’s quota is checked;
This flag is only set if the mailbox size is more than 50% of the ProhibitSendQuota limit;
If ProhibitSendQuota limit is not used, users will never receive a quota message; 
If the flag is set, Exchange will send a quota message during the QuotaNotificationSchedule interval and then clear the flag;
The flag is reset only when a message is sent from the mailbox;


Hope this helps clarifying the new behaviour regarding quota messages!

Thursday, April 19, 2012

Mailbox Item Count

Ever wondered how many items all the mailboxes in your Exchange environment currently have? Getting a weekly count of these, together with the total mailbox size, might be useful so you get a trend on your environment’s growth.
For a single mailbox, you can simply use the following cmdlet:
Get-MailboxStatistics user1 | Select ItemCount
Or if you want to get a count per database for example:
Get-MailboxStatistics –Database MDB1 | ForEach {$totalItems += $_.ItemCount}
$totalItems
If you want for every single mailbox in your environment, you can use the following cmdlet:
Get-Mailbox -ResultSize Unlimited | Get-MailboxStatistics | Select ItemCount | ForEach {$totalItems += $_.ItemCount}

Monday, June 1, 2009

Exchange Shared Mailboxes

What most administrators do when they want to create a mailbox that can be accessed by several users, is create a “normal” mailbox and hand the password to all of those who require access to it or give them full access permissions to it.

Either way, that also creates an enabled user account on Active Directory (AD) that users could use to login to a workstation, which is not very secured.

With Exchange 2007 and 2010 we have a new kind of mailboxes, a shared mailbox. A shared mailbox has a disabled AD account to which it is connected. Since the account is disabled, you don’t need to set a password and you can’t use it to login to a workstation! So, they act as a security measure. You will no longer be required to have extra username/password combinations for accessing your network. You can easily assign permissions specifically to those users requiring access.

However, you can’t create these accounts by the Exchange Management Console (EMC)... So, let’s fire up the shell!


Creating a Shared Mailbox
The process to create a share mailbox is exactly the same as a regular mailbox, with the exception of the option –Shared on the New-Mailbox command. For example, let’s create a shared mailbox to where all the quarantined e-mails will go to:

New-Mailbox –Name Quarantine –Alias quarantine –OrganizationalUnit “letsexchange.com/Users” –Database “Mailbox Database” –UserPrincipalName quarantine@letsexchange.com -Shared


This way, a disabled AD account will be created in the Organizational Unit Users with an attached mailbox. Since the account is disabled by default, no password is required.


Permissions
Since we don’t want to associate a password with a shared mailbox, we have to grant mailbox permissions for the users who require access to them.

We can assign permissions using security groups or just simply to users. To give me access to the Quarantine mailbox, all I have to do is:

Add-MailboxPermission Quarantine –User n.mota –AccessRights FullAccess


Now I have full access permissions to it. However, I’ll probably also want Send-As rights so that I can send e-mails with the shared mailbox's e-mail address.

Add-ADPermission Quarantine –User n.mota –ExtendedRights Send-As


You may want to add permissions to read/write personal information so that users can setup delegates if needed:

Add-ADPermission Quarantine –User n.mota –AccessRights ReadProperty, WriteProperty –Properties “Personal Information”


Accessing Shared Mailboxes
Since I now have full access permissions to this shared mailbox, one method for accessing it is to add it as an additional mailbox within Outlook. To do that:

• Open Outlook
• Go to Tools and click on Account Settings...
• Make sure your e-mail address is select and click on Change...
• Click on More Settings...
• Go to the Advanced tab and on the Open these additional mailboxes add the shared mailbox


This is the best method if you use the shared mailbox a lot as this allows you to read e-mails from the shared mailbox and sending as that e-mail address when desired. Unfortunately, this method will not save items sent as that mailbox to its Sent Items folder. All items sent or deleted within Outlook will be stored in the primary mailbox's Sent or Deleted Items folder.
This is something that doesn’t make sense to me and I hope to see it changed on the next version of Outlook.

You can also create a separate e-mail profile for Outlook to work with just this mailbox, thus preventing the previous “issue”.

The other option you have is, of course, to use Outlook Web Access (OWA). To open the shared mailbox, and since I already have full access permissions to it, I can open it by simply adding the quarantine@letsexchange.com e-mail address to the end of my normal OWA URL and authenticating using my normal domain credentials, like: https://htcas1/owa/quarantine@letsexchange.com


Or, by logging in to OWA with my normal account and opening this mailbox using the arrow besides my name on the top right hand corner.


Notes:
• The icon on the Exchange Console for a shared mailbox differs from the one for a regular mailbox;
• When check on the Exchange Console, you can see the difference on the Recipient Type Details column: User Mailbox vs Shared Mailbox;
• It’s possible to convert existing mailboxes into shared mailboxes! To do that, all that you need to do is: Set-Mailbox n.mota –Type Shared;
• To convert it back to a regular mailbox, just use the –Type Regular option.